
I have been sharpening my Dad skills in the kitchen lately, attempting to make things from scratch. One of my favorite discoveries has been wild sourdough bread. By popular demand of many family and friends, here is the story of my journey into the world of Wild Sourdough Bread…recipe included!
I was inspired to make wildly fermented sourdough bread after watching Michael Pollan’s docuseries Cooked. The goal was to make bread the way it was done for thousands of years, before tradition was abandoned for the speed and ease of fast acting commercial yeast. The strange thing about this adventure is that I had never even baked a non-wild bread, let alone an untamed beastly one. However, with the word “fermentation” in the instructions and a beer brewing background, I was excited about the prospects.
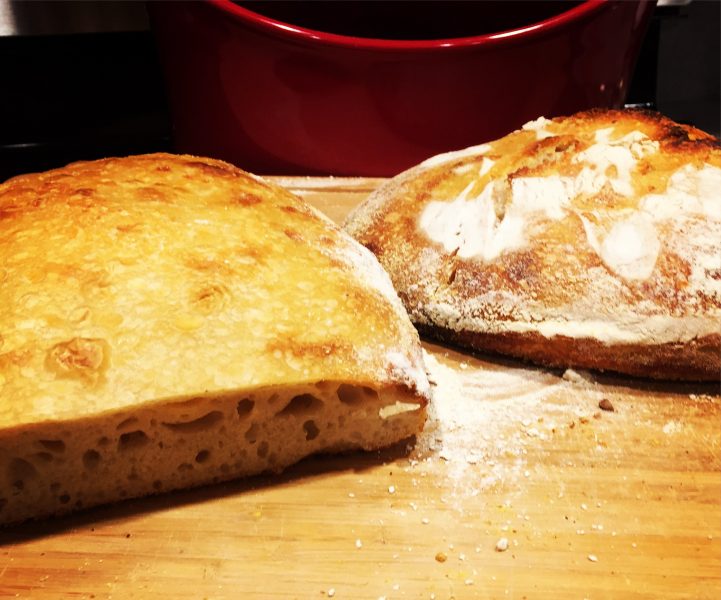
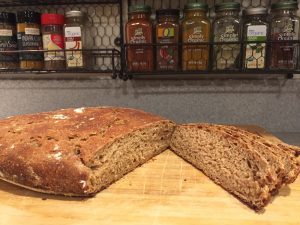
This wild bread is sourdough bread. It is long fermented using only three ingredients: flour, water, and salt (the yeast are in both the flour and the air). Making bread in this way takes a good chunk of time, so like brewing beer, it is a labor of love. It took me 4-5 days to make the starter. The neat thing about making a starter is that it can be used again and again for a seemingly infinite amount of time. Now that I have my starter, I can cook a loaf of homemade sourdough bread from scratch in about 24 hours.
The first time I made this bread, I failed at “shaping my loaf” and didn’t add enough flour. As I placed my saggy, unshaped dough into the oven for baking, I was feeling a little bit like a failure.

To my surprise, when I pulled the bread out of the oven it looked and smelled great. More importantly, it tasted amazing! I proudly served some to my wife when she got home from a long day of work.
There is something about providing for the ones you love that gives you a feeling of accomplishment. Whether it is warming up a bottle of milk, cooking the perfect quesadilla, or baking a loaf of wild bread, these things bring a sense of joy and fulfillment to a Stay at Home Dad.
This recipe produces the best sourdough bread I have ever eaten and it only costs about $2.00 per loaf (Note…that’s using organic ingredients and this figure is not counting the natural gas for the oven or a price tag on your time). I highly recommend baking the Wild Sourdough Bread to everyone. Don’t be scared!
Wild Sourdough Bread Recipe
I have baked a lot of wild sourdough bread and followed multiple recipes to get to my current method. After much trial and error, I have gathered successful techniques that I found from other sources and combined them with my own preferences to create the recipe laid out below.
To ensure consistency in my dough, I now use a scale to measure ingredients. Following this recipe to the “T” each time will give you a fairly consistent product, however, I should warn you that the starter is an ever-changing variable since it is alive. Therefore each loaf you make can turn out a little different.
I like to think of my wild sourdough as a work of art… kind of like a well-crafted barrel aged beer or a fine wine. Each can taste a little different depending on where it’s at in the aging process… always tastes wonderful but not always the same. My approach makes baking wild sourdough bread as easy as possible, thus making the baker (me) more likely to make it again.
Ingredients
2.5 ounces starter… Puts the “Wild” in the Wild Sourdough Bread.
2-2 1/2 teaspoons salt… I use Celtic Sea Salt but I doubt this really matters.
11 ounces luke warm water… I heat mine up in a Pyrex on the stove and use my finger to test it. If it feels hot, check the temperature. If it is greater than 95 degrees, cool it down. You don’t want to harm the yeast in the starter by pasteurizing it.
15 ounces flour… I use King Arthur organic bread flour for a light colored loaf and Great River organic bread flour for a darker colored and earthy flavored loaf.
Step 1- Make the starter.
The starter is the lifeblood of the wild sourdough bread. By definition, creating the starter without adding yeast is what makes it in fact “Wild”. The starter gives the bread it’s signature complex sour flavor and also contains the yeast that will fill the gluten pockets in the dough with carbon dioxide allowing your bread to rise.
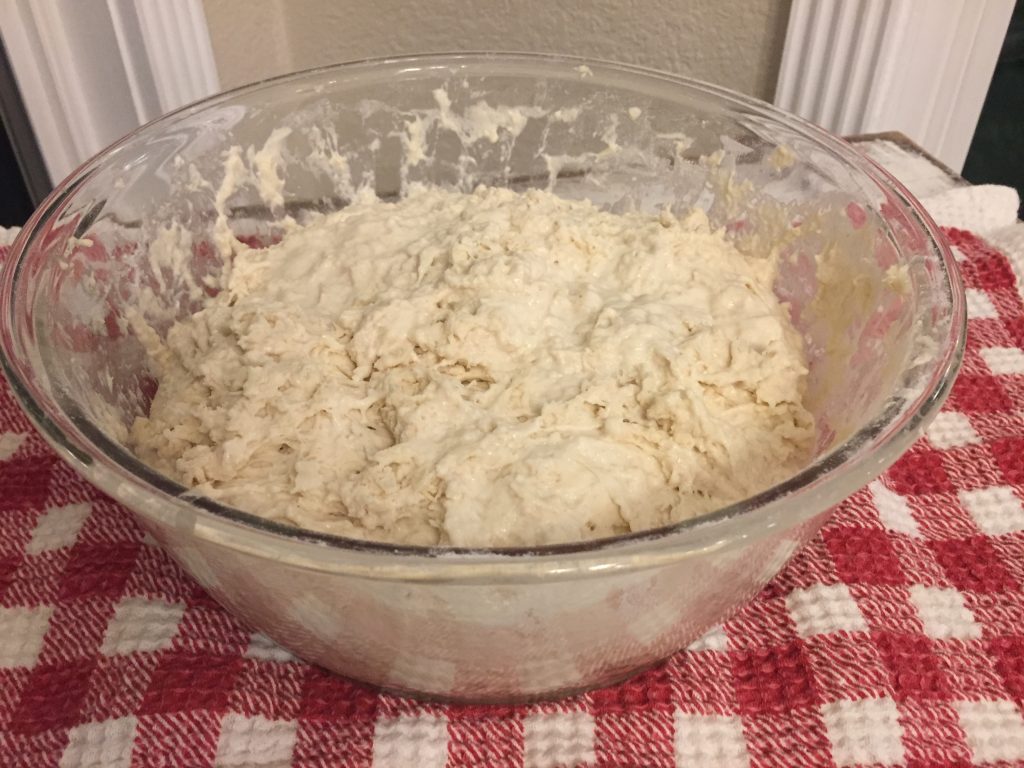
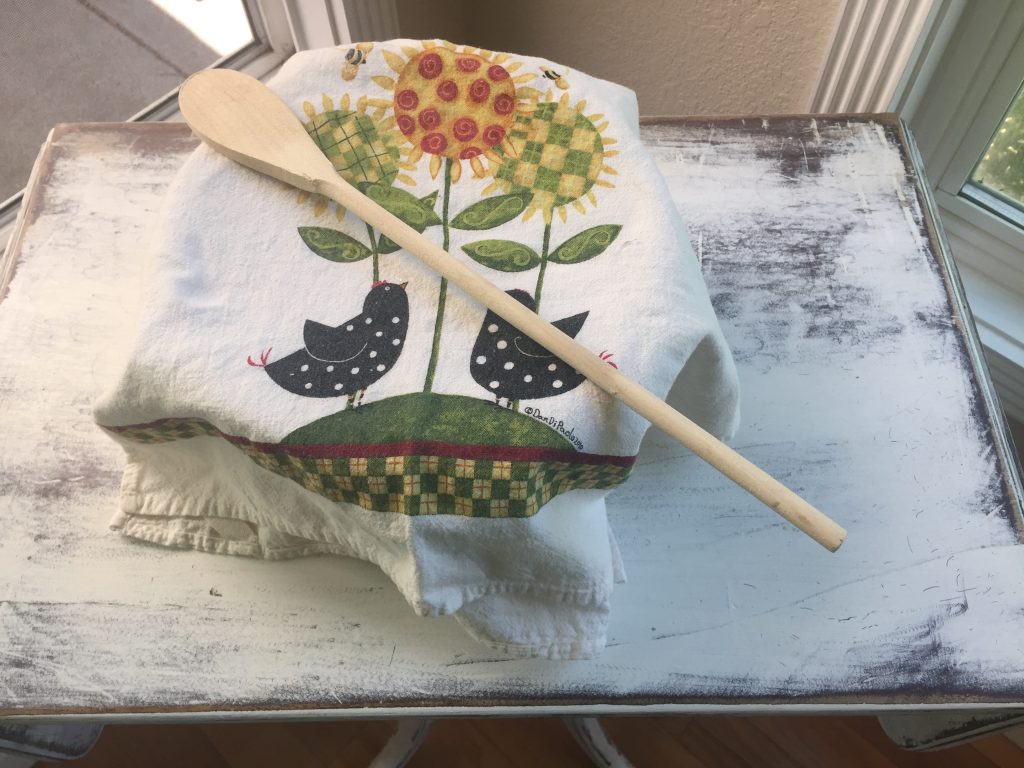
To make this, stir 2 cups of bread flour and 2 cups filtered water. I use a glass storage container even though the lid won’t be needed for the first 4-5 days. Make sure you mix it very well, I use a dedicated wooden spoon for all my bread mixing activities. I call it my “bread spoon”. It makes me feel like one of those ancient Belgian beer makers who used the same wooden paddle to mix their beer thus inoculating each batch with their signature yeast. This is part of the fun for me, but honestly, you can use any old spoon and it will get the job done. Once your starter is mixed, put a thin kitchen towel over it to keep the bugs out. It needs air so don’t put the lid on.
Stir it a couple of times each day for 4-5 days. Once the starter looks bubbly (not just from stirring but from yeast activity) then you have succeeded. Next you must feed your starter regularly.
Now that you have some strong yeast activity, feed it by stirring in 1-2 tablespoons of bread flour. If you keep it in the fridge, you only need to feed it once or twice per week. If you leave it on the counter, you need to feed it once or twice per day. Be sure to add filtered water as needed to keep a pancake batter consistency. When you use some of your starter to make a loaf of bread, be sure to add back equal parts flour and water totaling the amount you took out.
More Starter Tips and Tricks…
Nothing about this starter needs to be exact… it’s a wild, living ingredient. Similar to a houseplant, if you accidentally neglect your starter, just give it more food (bread flour) than prescribed and put it in a warm environment and it will come back to life. If you like your sourdough more sour, stress the starter out by leaving it on the counter and starving it for a day. If you like it less sour, feed it a half a cup of flour (and some filtered water) the day before you plan to bake… this will make the yeast stronger and dilute the souring bacteria. If your starter develops some dark liquid on top, pour it off and add flour or water to get it back to the targeted pancake batter consistency. As I said before, this is not an exact science, it is more of an art… an art that you can’t mess up and an art that you can eat!
Step 2- Mix the Ingredients in a Bowl/First fermentation.
First add 2.5oz (about 1/3 cup) of starter to the bowl, then add 11oz luke warm water. Next, add 2- 2 1/2 Teaspoons of salt (tinker with this number to find your preference) and stir it to help dissolve the salt. This will help evenly distribute the flavors. I will mention here that some bakers add the salt after the flour in a different step, but I have never had any problems doing it this way. It is easier and provides good results.
Once you get most of the salt dissolved into the liquid, you can mix in the flour. Continue to mix it until all of the flour is embodied. You should end up with a very thick and rough looking bowl of dough. Now, throw a towel over your bowl to keep the bugs out and let it sit for at least 8 hours. I always try to accomplish this step in the evening and let it sit all night and through the early morning.
Step 3- Shaping The Loaf.
Don’t get discouraged on this step, it isn’t easy to teach someone how to shape a loaf with words. I have botched this step pretty bad a few times and still ended up with a delicious loaf of bread, so don’t stress out if your loaf seems to have major flaws. The goal here is to dry the loaf out a bit with flour while kneading the loaf, and get your loaf to the shape you will eventually cook. I use my countertop as a working surface.

Scrape the dough ball out of the bowl and onto the flour sprinkled area. Note: this is a great time to add other ingredients such as garlic (3-5 cloves diced or chopped), or rosemary. Next, knead the dough a few times while adding some flour to dry it out. While this is technically a No-Knead recipe, I have found that a little kneading makes it easier to shape the loaf. If you want large air pockets in your finished product, knead it less. For smaller more uniformed air pockets, knead it more. Once I get the targeted shape, I inspect the underside of the loaf and pinch together any folds that are reluctant to be cohesive. This is tough to explain, here is a video.

Step 4- Second Fermentation.
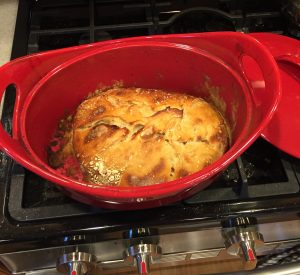
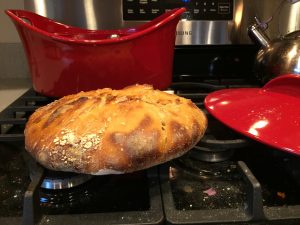
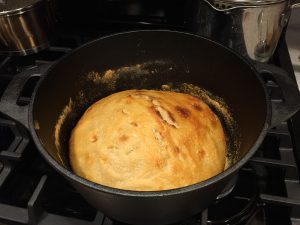
Once you have a shaped loaf it is time to place it into the dutch oven and let it rise. This is called second fermentation and is the final step before baking. Some blogs recommend letting the dough rise in a separate bowl and transferring it into a preheated dutch oven, but I found the extra step to be a waste of energy that didn’t seem to affect the final product. Once the loaf is in the dutch oven, I don’t take it out until it’s baked. I have used a 4.25 quart oval enameled dutch oven and a 5 quart round cast iron dutch oven, both will do the job but the round cast iron makes a better shaped loaf of bread and sticks less. I now only use the 5 quart round cast iron dutch oven.
To prep the dutch oven, I use a sandwich bag to spread out avocado or grapeseed oil (needs to have a high smoke point, baking temp is 475 degrees) on the bottom and lower sides of the dutch oven.
You only need to use a small amount of oil to cover the surfaces the bread will touch. If you use too much oil or cover unnecessary surface area, you can get a subtle smoked oil flavor on the crust of your bread. Once oiled, sprinkle a little flour or finely ground cornmeal over the oil (cornmeal is preferred but use whatever you’ve got). This method will keep the bread from sticking. Once the dutch oven is oiled and floured/cornmealed, you can set your shaped loaf in and put the lid on.
The goal is to get the shaped loaf to double in size and once it does, it’s baking time! If it is a warm day just leave it on the counter. In a moderately warm environment this will happen in 3-4 hours. I have had it take up to 5-6 hours. If you have a proofing setting on your oven you can use that and place it in the oven for 2-3 hours.

Step 5- Bake the Wild Sourdough Bread.
Preheat the oven to 475 degrees (don’t forget to take the dough out of the oven if you were using the proofing setting). Place the dutch oven into the oven and bake with the lid on for 35 minutes. Next, drop the temp to 350 degrees and bake for another 15 minutes with the lid off. Remove your dutch oven from the oven and use a fork or spatula to “pop” the loaf out. Place the hot loaf on a wooden cutting board and let it sit for 30 minutes. Don’t cut it right away!!! I know it is tempting, the smell will be alluring. Once the bread comes out of the oven, your spouse, your dog, and possibly even your neighbors will come poking around waiting for you to cut them a slice.
Eating and Storage.
I store my loaf in a one gallon ziplock freezer bag on the counter at room temperature. It will last for about one week. Honestly, I have rarely had one make it past a few days before being gobbled up.
My personal favorite way to eat this bread is sliced and toasted with a little butter or earth balance spread on it. This is a sure way to fatten you up for Thanksgiving. Enjoy!
Don’t hesitate to reach out with your questions, I am happy to help!
Wow! This is awesome! Such detail and info. It kind of reminds me of when I used to make friendship bread. You had to make a starter and then keep each bag of the starter in the freezer. And whenever you wanted to make it you just took a bag of starter out of the freezer. The only thing bad was when you ran out of starters you had to make the starter all over again. Loved this blog!
I’m really excited to try this. I started using the book “Flower, Water, Salt, and Yeast” last year to make bread but never gave sour dough a try. I’m inspired!
There’s something beautiful about making great food with minimal ingredients. In a world where everything we buy has words we can’t pronounce or decipher, it’s turning the clock back and sharing a piece of history.